Video creation is a bit overwhelming, especially for a newbie in this area; however, this indeed doesn't have to be so. Fun, work, or a side gig, all video-making endeavors are endeared by the simple fact that professional results can be easily achieved through CapCut's desktop video editor. This free tool is chock-full of features that make video editing easy, even for the total newbie. With some guidance, you will be editing like a pro.
A great starting point is CapCut's text-to-speech feature. It allows the user to add narration to his or her videos without having to rely on a microphone or any recording skill that is perfect for beginners who want to explain ideas clearly. In this guide, we will outline the fundamentals to video creation in CapCut's desktop video editor and show you how to get started with it in a stepwise approach.
Why Start With Video Content Production?
There are videos everywhere- from social media platforms to websites and emails, and they serve well to carry one's idea and tell a story or print a name. Well, as a novice in video-making, you don’t need fancy gadgets or software. CapCut has an all-in-one desktop editor for you to learn, explore, and cultivate the skill.
This is Easier than You Think
Editing is quite technical, but CapCut brings it down to the simplest because of the interface. You will be surprised at how fast you catch it.
Creative Possibilities Without Limit
Vlogs, tutorials, CapCut enable you to let your imagination run wild with inspiration. You will find it quite easy to apply your signature touch without much drama.
CapCut AI Video Generator: Speed up Your Workflow
For novices, the CapCut AI video generator comes as a big boon. This tool literally generates videos that you can edit from basic ideas in a matter of minutes, saving you hours of hard work. Make an intro or short clip? Just type in a description, and the AI does the rest of the much-needed help when you are still clumsy.
How AI Is Helpful for Novices
Transitions, music, and all that tricky stuff are handled by AI while you focus on the fun stuff: customizing. It amounts to having a very able assistant doing all the heavy lifting for you.
Editing Your First AI-Generated Video
After the AI builds your video, feel free to make adjustments to CapCut's desktop editor. Add your own clips or text for personal touches, a great way for you to practice editing basics.
Add Personality with CapCut’s Voice Changer
Audio can make or break a video. That's why voice changer tool is a very simple yet powerful tool you can use for fun sound experimentation. For someone who lacks confidence in recording their voice, this could easily convert a boring normal voice into anything fun or crazy, probably like a cartoon character or deeper-timbered, using no complicated arrangements whatsoever.
Bringing Your Videos to Life
A nifty voice effect is good enough to earn interest and keep one's eyes glued to the screen. It is very much a traditional trick to help differentiate your content from the rest as a newcomer.
Try Out Without Risk
Experiment with new styles or go crazy with a subtle robotic effect. Undo it if it doesn't work and begin afresh.
Step-by-Step: Creating Your First Video with CapCut Desktop Video Editor
If you’re new to video editing, CapCut’s desktop editor is the perfect place to start. Whether you're creating a casual vlog or a fun recap to share with friends, CapCut’s intuitive tools make it easy to bring your ideas to life. Just follow these quick steps and you’ll have a ready-to-share video in minutes.
-
Import your video
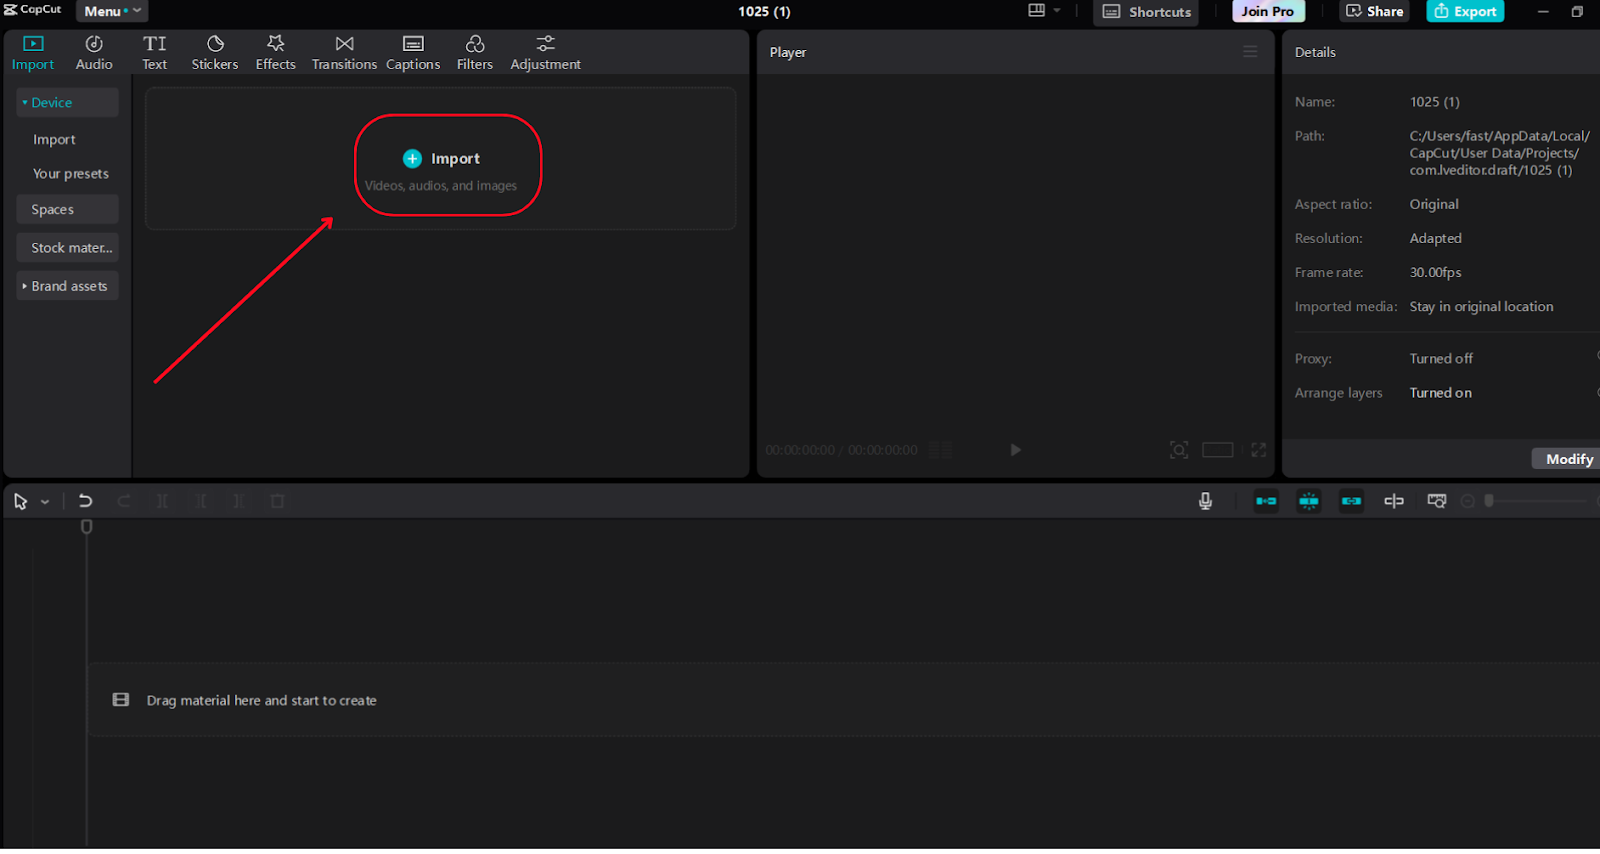
Begin by downloading the CapCut desktop version from the official website and installing it on your Windows or Mac device. Launch the app and click “New Project” from the main screen to enter the editor. Next, click the “Import” button in the upper left corner to upload your clips, photos, or background music. Once imported, drag your media files to the timeline at the bottom to start building your sequence. You can arrange the order of clips or trim them as needed.
-
Customize your video
To add some narration, head to the “Text” tab in the left sidebar and select “Text-to-Speech.” Type in a simple line like “Welcome to my first video!”, choose a voice that fits your style, and click “Generate.” Add the resulting audio to your timeline and sync it with your visuals.
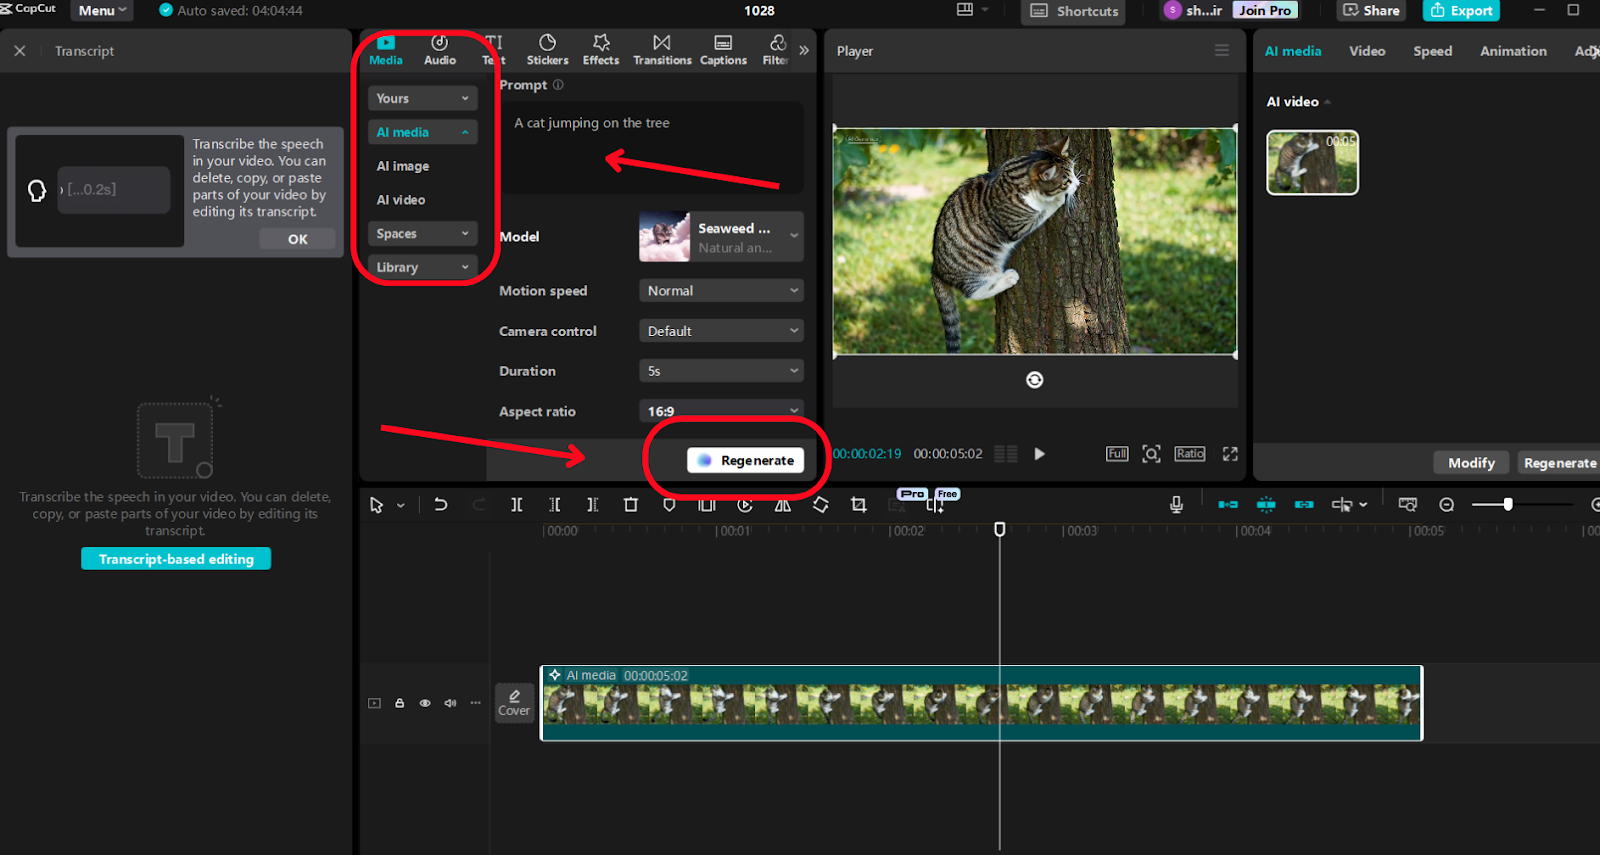
Want to boost creativity even more? Click on “Media” in the top menu and select “AI meida.” Enter a prompt like “Fun weekend highlights,” and CapCut will generate a quick video for you to enhance or incorporate. You can personalize it with text overlays, stickers, or filters.
If you’re feeling playful, highlight your audio track and explore the “Voice Changer” feature under the “Audio” tab. Try effects like “Helium” or “Deep,” adjust the pitch, and preview the changes to find what fits.
-
Export your edited video
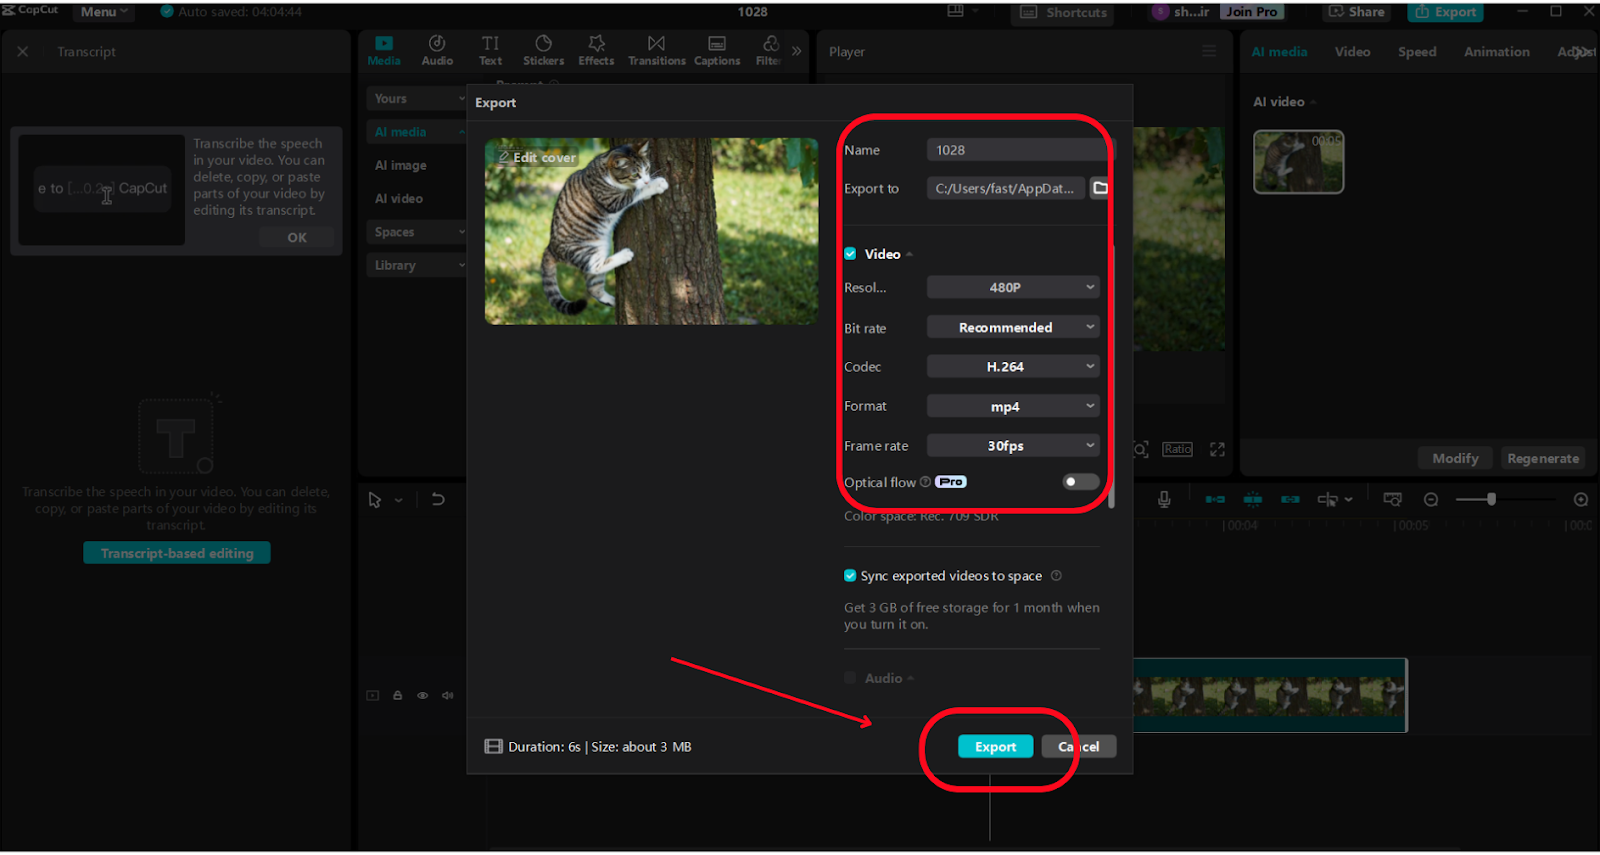
Once everything is in place, add final touches with stickers or titles from the “Elements” tab. Use the preview button to check your full video, then click “Export” in the top-right corner. Choose a resolution like 720p or 1080p, and save your video — ready to share with the world!
Conclusion
Finally, the CapCut desktop editor would be the perfect first step for any beginners interested in producing video content. The user could enjoy interesting and fun edits with the text-to-speech feature, AI video generator, and voice changer without even having prior experience in building videos. Follow the steps above, play around, and build confidence edit by edit. CapCut download today to get started on creating video content!